
 The week or so before Thanksgiving, my mom and I had a state of the union on everyone’s current eating habits so we could craft this year’s holiday menu. Yes, we’re still both gluten free. Yes, I’m also dairy free this year. While I’m blessed to have inherited my love of a healthy lifestyle from my mom (which makes these convos and recipe alterations easy), I have friends and patients that are not as lucky that way. I’ve taken pains to cook for food sensitivities only to watch that person eat everything they claimed not to eat. I have another friend who preps and carries her meals with her whenever she has to go to family gatherings. While I understand that altering SOME recipes is viewed as sacreligious, I do feel like many people have tried to alter their holiday menus to lessen the hit on their waistlines or to accomodate food sensitivities. Here are some of the best light or allergy substitutions for your holiday favorites
Easy Substitutions:
- Coconut coffee creamer for Half and Half or Cream
- Gluten free bread for regular
- Cacao nibs for chocolate chips
- Meringue for frosting
- Unsweetened applesauce for oil
- Date paste or vanilla extract in lieu of sugar
- Nut flours for white flours
- Nutritional yeast for cheese
- Butter flavored coconut oil for butter
Skip and Pick Items
* Skip: Dinner Rolls Pick: Veggies and Dip
* Skip: Cranberry Sauce Pick: Cranberry Butternut Squash
* Skip: Sausage Stuffing Pick: Wild Rice Stuffing
* Skip: White Potatoes Pick: Sweet Potatoes
* Skip: Egg Nog Pick: Hot Chocolate
* Skip: Green Bean Casserole Pick: Roasted Brussels Sprouts.
Recipes
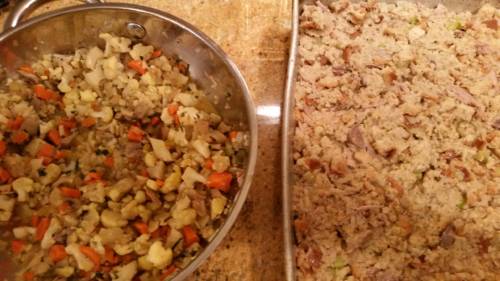
CAULIFLOWER STUFFING
My mom made this this year and it was A-MAZING. Expert tip: cut all your vegetables to the same size.
TOTAL TIME: 0:30 PREP: 0:15 SERVES: 6
AUTHOR: delish.com
INGREDIENTS
* 4 tbsp. butter
* 1 onion, chopped
* 2 large carrots, peeled and chopped
* 2 celery stalks, chopped or thinly sliced
* 1 small head cauliflower, chopped
* 1 c. chopped mushrooms
* kosher salt
* Freshly ground black pepper
* 1/4 c. chopped fresh parsley
* 2 tbsp. chopped fresh rosemary
* 1 tbsp. chopped fresh sage (or 1 tsp. ground sage)
* 1/2 c. vegetable or chicken broth
DIRECTIONS
1. In a large skillet over medium heat, melt butter. Add onion, carrot, and celery and sauté until soft, 7 to 8 minutes.
2. Add cauliflower and mushrooms and season with salt and pepper. Cook until tender, 8 to 10 minutes more.
3. Add parsley, rosemary, and sage and stir until combined, then pour over vegetable broth and cover with a lid. Cover until totally tender and liquid is absorbed, 15 minutes.
4. Serve.
Gluten-Free & Vegan Gravy
Prep Time
5 mins
Cook Time
15 mins
Total Time
20 mins
AUTHOR: DETOXINISTA.COM
This healthy gravy recipe is gluten-free, low-fat, and vegan and might be the best gravy I’ve ever tasted. It’s loaded with flavor and is perfect for serving over holiday side dishes.
Ingredients
* 1 tablespoon olive oil (or water)
* 1 yellow onion , chopped
* 2 garlic cloves , minced
* 4 ounces mushrooms , sliced (about 1 cup loosely packed)
* 1 medium Yukon gold potato , cut into 1-inch chunks (4-6 ounces by weight)
* 2 tablespoons tamari (gluten-free soy sauce)
* 1 cup water
* 1/2 teaspoon fine sea salt
* 1/4 teaspoon black pepper
Instructions
1. Heat the olive oil in a large skillet over medium heat and saute the onion until it starts to soften, about 5 minutes.
2. Add in the garlic and mushrooms and stir for 1 or 2 minutes, just until the garlic is fragrant. Add in the potato, tamari, and water and bring the water to a boil.
3. Once boiling, lower the heat to a simmer and cover the pan. Cook until the potatoes are fork-tender, about 10 minutes. (The smaller you cut the potatoes, the faster they will cook.)
4. Once tender, carefully transfer the contents of the pan to a high-speed blender or food processor, and add in the salt and black pepper. Blend until smooth, using a towel to carefully cover the vent at the top of your machine so that the steam can escape. (And not blow the lid off your blender!)
5. Adjust any seasoning to taste and serve warm over your favorite side dish or main course. Leftover gravy can be stored in an airtight container for up to a week in the fridge.
Butternut Squash Mac & Cheese
Author: Cooking Light
This has been my go-to take along dish for the last few Thanksgivings. You can go totally dairy free with a Nutritional Yeast Cheese Sauce or by using a Pre-Packaged Nut Cheese (my favorite is by So Delicious)
Ingredients
* 3 cups cubed peeled butternut squash (about 1 [1-pound] squash)
*1 1/4 cups fat-free, lower-sodium chicken broth
*1 1/2 cups fat-free milk
*2 garlic cloves, peeled
*2 tablespoons plain fat-free Greek yogurt
*1 teaspoon kosher salt
*1/2 teaspoon freshly ground black pepper
*1 1/4 cups (5 ounces) shredded Gruyère cheese
*1 cup (4 ounces) grated pecorino Romano cheese
*1/4 cup (1 ounce) finely grated fresh Parmigiano-Reggiano cheese, divided
*1 pound uncooked cavatappi (use rice noodles if going Gluten – Free)
*Cooking spray
*1 teaspoon olive oil
*1/2 cup panko (Japanese breadcrumbs) – (for Gluten Free – cook 1 cup quinoa, drain and spread in a single layer on a baking sheet – bake at a 350 oven for 15-20 min or until crunchy. This is a great replacement for any use of breadcrumbs)
*2 tablespoons chopped fresh parsley
How to Make It
Step 1
Preheat oven to 375°.
Step 2
Combine squash, broth, milk, and garlic in a medium saucepan; bring to a boil over medium-high heat. Reduce heat to medium, and simmer until squash is tender when pierced with a fork, about 25 minutes. Remove from heat.
Step 3
Place the hot squash mixture in a blender. Add salt, pepper, and Greek yogurt. Remove the center piece of blender lid (to allow steam to escape); secure blender lid on blender. Place a clean towel over opening in blender lid (to avoid splatters). Blend until smooth. Place blended squash mixture in a bowl; stir in Gruyère, pecorino Romano, and 2 tablespoons Parmigiano-Reggiano. Stir until combined.
Step 4
Cook pasta according to package directions, omitting salt and fat; drain well. Add pasta to squash mixture, and stir until combined. Spread mixture evenly into a 13 x 9-inch glass or ceramic baking dish coated with cooking spray.
Step 5
Heat oil in a medium skillet over medium heat. Add panko, and cook for 2 minutes or until golden brown. Remove from heat; stir in remaining 2 tablespoons Parmigiano-Reggiano cheese. Sprinkle evenly over the hot pasta mixture. Lightly coat topping with cooking spray.
Step 6
Bake at 375° for 25 minutes or until bubbly. Sprinkle with parsley, and serve immediately.
Sweet Potato Crumble Casserole
Vegan, gluten-free, refined sugar-free, soy-free
Author: detoxinista.com
This is a side dish you’re going to want on the holiday dinner table! The crunchy nut crumble tastes just like an oatmeal cookie. I recommend serving this casserole with a pat of vegan butter or coconut oil to really take it over the top. Also try serving it with Coconut Whipped Cream for a decadent twist. In this recipe, I swapped out half the vegan butter for virgin coconut oil to add some heart-healthy fats while still retaining that lovely butter flavor.
Yield : 8 servings Prep time : 35 Minutes Cook time : 35 Minutes Author: detoxinista.com
Ingredients:
For the sweet potato mash:
* 4 1/2 to 5 pounds sweet potatoes (about 4 to 5 large)
* 1 1/2 tablespoons vegan butter (or butter flavored coconut oil from Nutiva or Barlean’s)
* 1 1/2 tablespoons virgin coconut oil
* 2 1/2 tablespoons pure maple syrup, or to taste
* 1 teaspoon pure vanilla extract
* 3/4 teaspoon cinnamon
* 1/8 teaspoon ground nutmeg
* 1/2 teaspoon fine grain salt, or to taste
For the Crunchy Nut Crumble:
* 1 cup rolled oats (use certified gluten-free if necessary)
* 1 1/3 cups pecan halves, chopped
* 1/3 cup almond meal or almond flour
* 1 teaspoon cinnamon
* 1/4 teaspoon fine grain sea salt
* 2 tablespoons virgin coconut oil, melted
* 2 tablespoons vegan butter, melted
* 2 1/2 tablespoons pure maple syrup
Directions:
1. Peel and roughly chop sweet potatoes into large chunks. Place into a large pot and cover with water. Bring water to a boil, reduce heat to medium-high, and gently boil for 10 to 20 minutes, until the potatoes are fork tender. Drain.
2. Preheat oven to 375°F. Lightly grease a 2 1/2-quart (10-cup) casserole dish and set aside.
3. Prepare the crumble topping: Pulse the oats in a food processor until coarsely chopped. In a medium bowl, stir together the chopped pecans, oats, almond meal/flour, cinnamon, and salt. Pour on melted coconut oil, melted butter, and maple syrup. Stir until combined.
4. Once cooked and drained, place sweet potatoes into a large bowl.
5. Mash potatoes with the butter and coconut oil until smooth. Now, stir in the maple syrup, vanilla, cinnamon, nutmeg, and salt. Adjust to taste if desired. Spoon into casserole dish and smooth out.
6. Sprinkle the crumble topping all over the sweet potato mixture, evenly.
7. Bake, uncovered, at 375°F for 16 to 23 minutes, until the dish is hot throughout. Plate and serve immediately with a pat of vegan butter or coconut oil.
Tips:
* For a creamy twist, try subbing some of the butter/oil in the sweet potato mash for full-fat canned coconut cream.
The secret to this sweet, slightly tangy dish: the touch of sherry vinegar in the glaze.
Roasted Winter Vegetables
Ingredients
* 1 1/4 pounds parsnips, peeled and sliced
*1/2 inch thick
*1 1/4 pounds carrots, peeled and sliced 1/2 inch thick
*One 1 1/4 pound celery root—peeled, quartered and sliced 1/2 inch thick
*1 1/4 pounds golden beets, peeled and sliced
*1/2 inch thick
1/2 cup extra-virgin olive oil
*1/2 cup honey6 thyme sprigs
*Salt and freshly ground pepper
*2 tablespoons sherry vinegar
How to Make It
Preheat the oven to 425°. In a large bowl, toss the root vegetables with the oil, honey and thyme and season with salt and pepper. Divide between 2 large, sturdy rimmed baking sheets. Cover with foil and roast for 40 minutes, shifting the pans once, until the vegetables are tender. Remove the foil and roast for 10 minutes longer, until glazed. Return them to the bowl and stir in the vinegar then season with salt and pepper. Serve right away. (The vegetables can be cooked early in the day and kept at room temperature before rewarming.)
Vegan Skillet “Cornbread”
Prep Time
10 mins
Cook Time
30 mins
Total Time
40 mins
An easy gluten-free alternative to cornbread!
AUTHOR: DETOXINISTA.COM
Ingredients
* 1 1/2 cups millet , soaked in water for at least 2 hours
* 1/4 cup white chia seeds
* 1 cup water
* 1 cup peeled and diced zucchini
* 1/4 cup coconut sugar
* 1/2 teaspoon salt
* 1/2 teaspoon baking soda
* 1/4 cup melted coconut oil
* 2 teaspoons apple cider vinegar
Instructions
1. Preheat the oven to 350ºF and grease a 10-inch skillet with coconut oil. Drain the soaked millet and rinse well in a mesh strainer. Transfer the drained millet to a large food processor fitted with an “S” blade, then add in the chia seeds, water, zucchini, coconut sugar, salt, baking soda, and coconut oil. Process until the millet has broken down and a smooth batter is formed, about 2 to 3 minutes. Add in the vinegar and process again briefly to incorporate.
2. Pour the batter into the greased skillet and bake at 350ºF until the center feels firm when gently touched, about 30 to 35 minutes. Allow the bread to cool at least 20 minutes before slicing and serving. Store any leftover bread in an airtight container on the counter for up to 3 days, or in the fridge for up to a week.
Note: Soaking the millet helps it break down easier in the food processor. You’re welcome to soak it in the fridge overnight if you want to plan ahead of time. The zucchini is crucial to the soft and fluffy texture of this bread, so don’t be tempted to leave it out. (Though another vegetable puree might work.)
Ingredients
* 1 whole dried habanero chile, stemmed and crushed
*1 tablespoon whole allspice berries
*1 tablespoon coriander seeds
*1 tablespoon black peppercorns
*1/2 teaspoon whole cloves
*1 tablespoon dried thyme
*1/2 teaspoon ground ginger
*1/4 teaspoon freshly grated nutmeg
*1/2 cup extra-virgin olive oil
*One 15-ounce can chickpeas, drained and patted dry
(1 pound small brussels sprouts, halved lengthwise4 cups cauliflower florets (from 1 head) Salt
How to Make It
Step 1
Preheat the oven to 425°. In a medium skillet, combine the habanero, allspice, coriander, peppercorns and cloves and toast over low heat, shaking the pan, until fragrant, about 2 minutes. Let cool, then transfer to a spice grinder. Add the thyme, ginger and nutmeg and grind to a powder.
Step 2
Heat a roasting pan over high heat. Add the oil and chickpeas and cook until browned and slightly crispy, about 5 minutes. Add the brussels sprouts and cauliflower, season with salt and cook, stirring, until lightly browned, about 5 minutes. Transfer the pan to the oven and roast the vegetables for about 15 minutes, until tender. Sprinkle with 1 teaspoon of the spice mixture and serve right away.
Make Ahead. The spice blend can be stored in an airtight container for up to 6 months.
No-Bake Pecan Pie Bars (Vegan, Paleo)
Prep Time
45 mins
Total Time
45 mins
Featuring nutrient-rich dates and buttery pecans, these no-bake bars are deceptively brimming with a variety of B vitamins, iron, and fiber– but, all you will taste is the distinctive, rich flavor of pecan pie!
AUTHOR: DETOXINISTA.COM
Ingredients
* For the Crust: 1 cup Medjool dates , pitted
* 1 cup raw pecans
* 1 cup unsweetened shredded coconut
* 1 tablespoon coconut oil
* 1/2 teaspoon salt
* For the filling: 1 cup Medjool dates , pitted
* 2 tablespoons pure maple syrup
* 2 tablespoons coconut oil
* 1 cup raw pecans
* 1/4 cup water , or more as needed for blending
* 1/4 teaspoon fine sea salt
* For topping: 1 cup of additional pecans
* Optional: 1 1/2 cups dark chocolate chips , divided for filling/topping
Instructions
1. Line an 8″ x 8″ baking dish with plastic wrap, for easy removal of the bars.
2. In a large food processor, combine the crust ingredients and blend until a sticky dough is formed. Press the crust into the lined baking sheet, using your hands or a spatula to smooth it out. *For dark chocolate pecan pie bars, melt 1 cup of dark chocolate chips and pour the melted chocolate over the crust, using a spatula to spread evenly.
3. Place the crust in the freezer to set, while you prepare the filling.
4. For the filling, combine all of the ingredients in a high-speed blender, or food processor, and blend until thoroughly combined. You may need to stop and scrape down the sides, or use a tamper, to keep everything blending smoothly. Adjust sweetness to taste, if necessary.
5. Remove the crust from the freezer, and pour in the filling, using a spatula to smooth the top. Sprinkle the additional cup of raw pecans over the top, and gently press them into the filling for easy serving. Drizzle an additional 1/2 cup of melted dark chocolate chips over the top, if desired.
6. Return the bars to the freezer, and allow them to set for at least 6 hours, or overnight, before cutting and serving.
Paleo Pumpkin Chocolate Cheesecake
Prep Time
20 mins
Total Time
20 mins
A creamy pumpkin cheesecake with a decorative chocolate topping, this dessert makes a perfect Halloween treat!
AUTHOR: DETOXINISTA.COM
Ingredients
Crust:
* 1 1/2 cups almond flour
* 3 tablespoons melted coconut oil
* 2 tablespoons pure maple syrup
* pinch of salt
Pumpkin Filling:
* 2 cups raw cashews , or 1 cup raw cashew butter
* 1/2 cup pumpkin puree
* 1/2 cup pure maple syrup
* 1/4 cup melted coconut oil
* 1 teaspoon ground cinnamon
* 1 teaspoon fresh lemon juice
* 1/2 teaspoon ground ginger
* 1/8 teaspoon ground cloves
* 1/8 teaspoon sea salt
Chocolate Topping:
* 2 tablespoons cocoa powder
* 2 tablespoons melted coconut oil
* 1 1/2 tablespoons pure maple syrup
Instructions
1. To prepare the crust, line a springform pan with parchment paper and combine all of the ingredients in a medium mixing bowl creating a shortbread-like dough. Press the dough into the bottom of the pan evenly, creating a thin crust, and set it aside.
2. To prepare the pumpkin filling, grind the cashews in a blender or food processor until they are very finely ground (it’s okay if they start to turn into cashew butter). Add in the rest of the filling ingredients and blend until smooth, stopping to scrape down the sides of the container if necessary. If you’re using cashew butter, you can skip the blender and just mix all of the filling ingredients together in a bowl until very smooth. Pour the filling over the crust and use a spatula to spread the filling to the edges and smooth the top. Set aside.
3. To prepare the chocolate topping, combine the three ingredients in a small bowl and stir well to combine. Transfer the chocolate to an icing bag or to a plastic sandwich bag with the tip cut off. Pipe the chocolate topping in a spiral design, starting from the center and working your way towards the edge of the cheesecake. Drag a knife from the center of the spiral to the edge of the pan, almost like you’re slicing it into pieces to create a spider web-like design. (Even with my splotchy icing skills, I think the result still looks pretty impressive, so it’s hard to mess this up!)
4. Place the pan in the freezer to set until firm, about 4 to 6 hours or overnight. Once firm, you can transfer the cheesecake to the fridge for a softer more cheesecake-like texture, but keep in mind that this cake will start to melt at room temperature, so serve it quickly after slicing. (You can serve it directly from the freezer, too, but the flavors aren’t as strong when frozen– it gets better after sitting on the counter for about 10 minutes.) I’d recommend storing any leftovers in the fridge for up to a week, but if you want to store it longer it should keep indefinitely in the freezer when stored in an airtight container.
VEGAN PUMPKIN CHEESECAKE
A friend of mine made this over T-Gives – I can’t wait to try it!
Prep time
6 hours 30 mins
Total time
6 hours 30 mins
Author: Minimalist Baker
Recipe type: Dessert
Cuisine: Vegan, Gluten-Free
Serves: 8
Ingredients
CRUST
* 1 cup packed medjool dates, pitted (about 20 dates or 275 g | pitted before measuring)
* 1 1/2 cups (180 g) raw walnuts
* Pinch sea salt
FILLING
* 1 1/2 cups (180 g) raw cashews (soaked in very hot water for 1 hour)
* 1 lemon, juiced (2 Tbsp or 30 ml )
* 1/4 cup + 1 Tbsp (73 ml) light or full-fat coconut milk (or sub unsweetened almond milk)
* 3 Tbsp (45 ml) olive oil (or sub melted coconut oil, though it will add coconut flavor)
* 1/2 cup (120 ml) grade A maple syrup* or light agave nectar, plus more to taste
* 1/4 cup + 1 Tbsp (63 g) pumpkin puree
* Pinch sea salt
* 3/4 tsp pumpkin pie spice
* optional: 1 tsp vanilla extract
* optional: 1/4 tsp ground cinnamon
FOR SERVING optional
* Coconut whipped cream
* Brown sugar pecans
Instructions
1. Cover cashews with boiling-hot water. Let rest, uncovered, at room temperature for 1 hour. Then drain thoroughly and set aside.
2. In the meantime, add dates to a blender and blend until small bits remain, or it forms a ball. Remove and set aside.
3. Add walnuts and salt to blender and process into a meal. Then add dates back in and blend until a loose dough forms – it should stick together when you squeeze a bit between your fingers. If too crumbly, add a few more dates. If too sticky, add more crushed walnuts. Set aside.
4. If using a springform pan, line with parchment paper. If using ramekins or muffin tins, cut parchment paper into circles the size of the base of your ramekins or muffin tins. Also, cut out two long strips of parchment paper per ramekin and lay them in an “X” shape at the base. Top with circle shape. This creates little tabs that make removing the cheesecakes easier to pop out once set. (For muffin tins, you can also just use cupcake liners.)
5. Divide crust evenly among ramekins or tins (or springform pan), and press down with fingers to evenly distribute. Use a small glass wrapped in parchment paper, or the back of a spoon, to press down firmly, allowing some crust to come up the sides. Set in freezer.
6. Once cashews are soaked and drained, add to blender with remaining filling ingredients and puree until very smooth – 2-3 minutes. If it has trouble blending add a touch more coconut milk (or almond milk). Taste and adjust flavor/sweetness as needed.
7. Divide filling evenly among the ramekins or tins (or pour into a parchment-lined springform pan). Tap a few times to release any air bubbles, then cover loosely with plastic wrap and freeze until firm – about 4-6 hours, depending on size of dish.
8. Once set, run a butter knife along the edge and gently remove by tugging on the tabs in an upward motion. They should pop right out. If they aren’t quite set, pop them back in the freezer until firm. If using a springform pan, simply pop open and remove cheesecake.
9. Serve with a touch of coconut whipped cream and brown sugar pecans (optional | recipe links above).
10. Store leftovers in the freezer for 7-10 days, though best when enjoyed within the first 3-4 days. Let thaw at room temperature 15-20 minutes before serving for best texture.
Did we miss something? Let us know! Share your favorite healthy holiday recipe.
For more kitchen hacks and healthy eating tips and tricks, check out my monthly wellness challenges. In addition to theses gems, you’ll get accountability, a targeted nutrition plan, superfood magic and coaching from yours truly. Don’t wait until the New Year, win a FREE thirty minute massage when you join in December.